Stenomod Stand
I planned on writing this a lot earlier but when Robert Fontaine from the Plover Discord channel suggested adding ball joints to get “some twist on the wrist”, I had to try that out. The delivery from China as well as moving to a new city further postponed this post but here it is.
First off, the final stand:
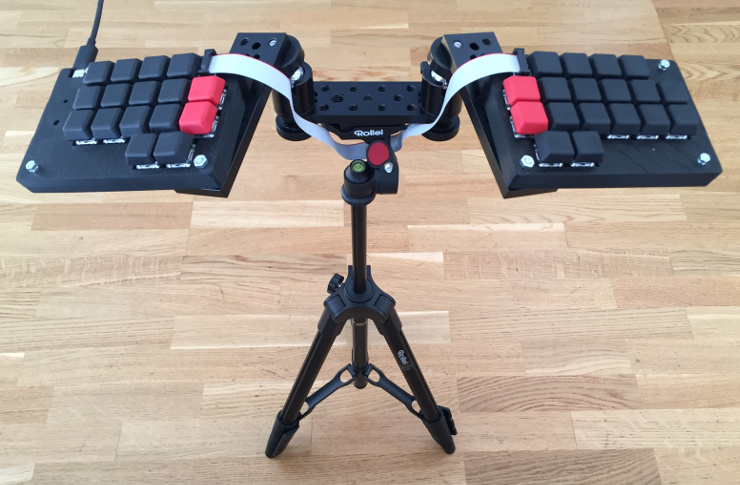
The good news—especially for me because I’m not a craftsman at all—is that putting this stand together requires nothing more than knowing how to order stuff from Amazon.
I ordered the parts on amazon.de but was able to find them or similar versions on the amazon.com:
- 2 x EXMAX 360 Degree Aluminum Alloy Body Rotating Swivel Mini Tripod Ball Head with 1/4” Screw Thread…
- 3 x SmallRig Multi-function Mounting Plate Cheese Plate with 1/4” and 3/8” Connections for Sony F970…
- 1 x Rollei Compact Traveler Star S1 (DIGI 3400) - Compact Tripod, Height 125 cm, with Ball Head, Aluminium… (Currently not available but pretty much any tripod will do.)
- 1 x Desmond 2 x Long Screw 1/4” Camera Body / Tripod / Bracket Male & Female Threads (That’s not exactly the ones I got but they have the same length. Mine are SmallRig 1/4” Kamera Montage Thumbscrew mit Rändelkopf from amazon.de. They should be around 15mm long.)
In addition, you’ll need four bolts and nuts to fix the stenomod on the cheese plates which I didn’t order online.
Here’s an overview of the parts with the two cheese plates already fixed to the stenomod halves:
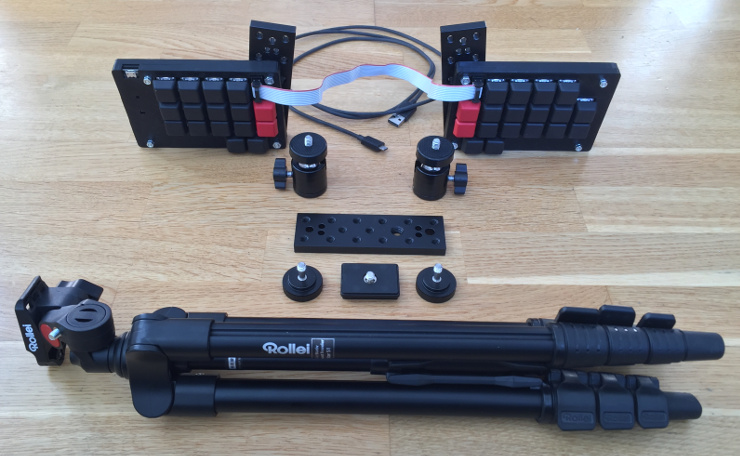
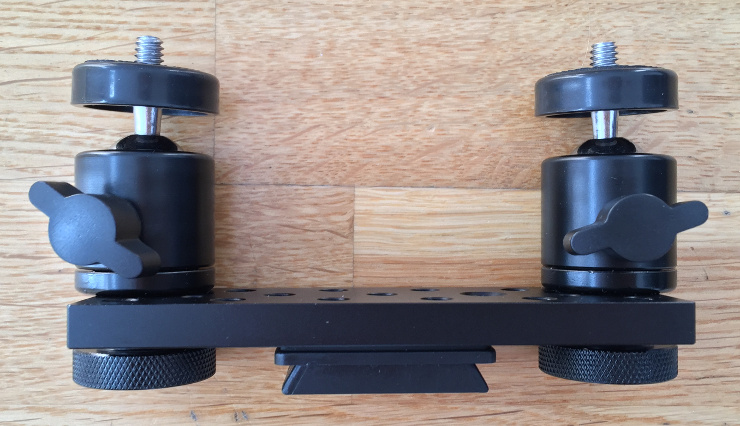
The small plate between the two thumbscrews belongs to the tripod and makes disassembling quite easy. This is the center piece of the stand:
And here’s how the cheese plates are fixed to the stenomod:
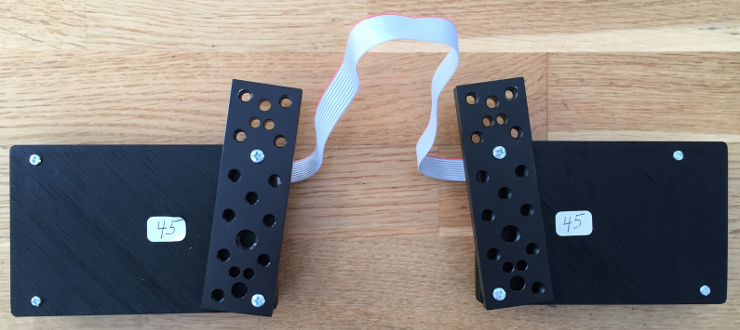
As you can see, the holes of the stenomod case align perfectly with the cheese plate holes which was super fortunate. Even the long white cable to connect the two stenomod halves which Charley included has exactly the right length.
The final assembly is a piece of cake. Just click the center piece on the tripod and screw the stenomod halves on the ball joints. The tripod together with the ball joints allows pretty much any positioning imaginable. Thank you Robert for the idea to add the joints!
This is how the stand looks like in action:
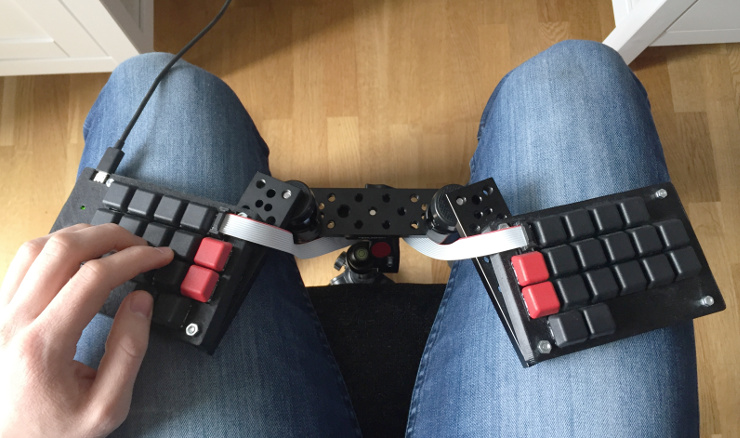
Let me know if you have any questions about the parts or assembly!