The Stenomod
Here it is! My Stenomod arrived a few days after my last post and, after a trip to the local customs office, I received it on the 11th of July. Thereby, today marks exactly two weeks after my first strokes on the keyboard.
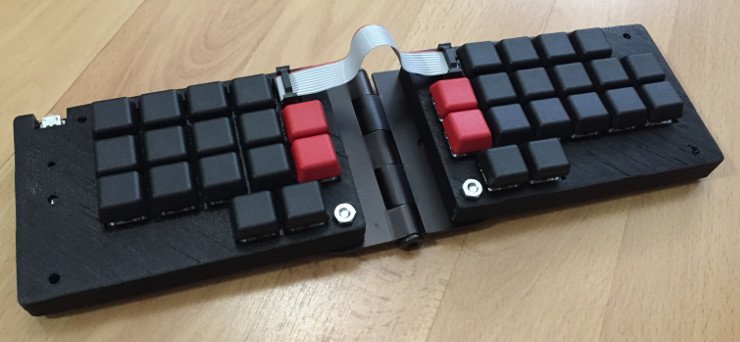
Before I talk about my experiences so far, let’s have a closer look at this beauty. First, an overview of the accessories that came in the box:
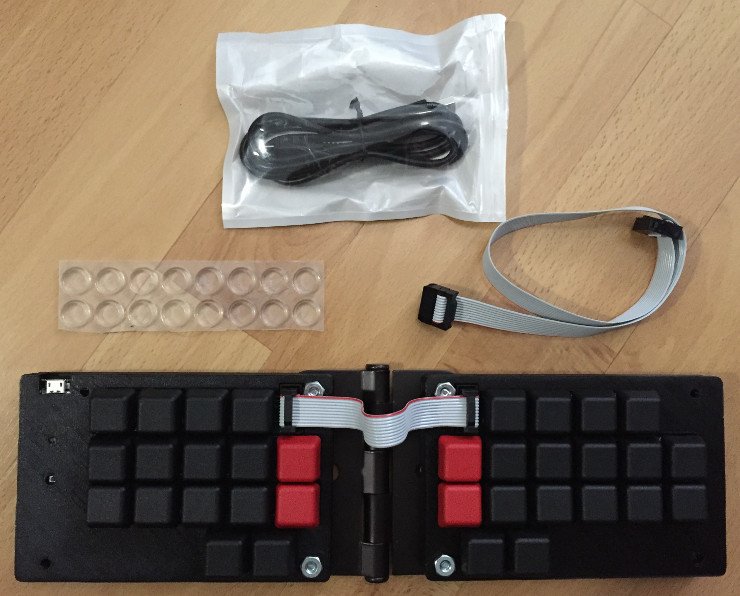
We have a 90cm (35 inch) micro USB cable, 16 (!) additional rubber feet, and a 35cm (13.8 inch) cable to connect the two keyboard halves. This is in addition to the 10cm (3.9 inch) cable that is already plugged into the keyboard.
The main reason why I chose “the Hinge” was this:
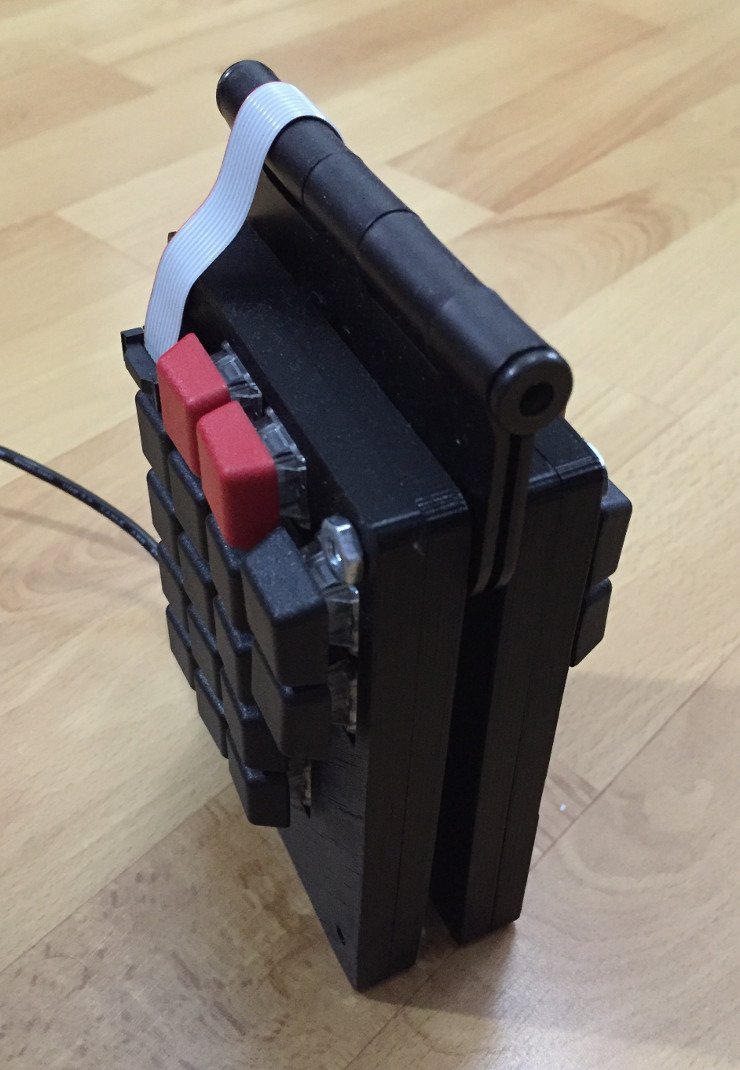
In this state, the Stenomod takes about the same desktop real estate as a coffee mug. This is especially nice since I currently don’t use it as my main keyboard (obviously). To get a better idea of how the Stenomod fits on my desk, here’s a comparison to my QWERTY keyboard, a Vortex Pok3r with MX Clears, both unfolded and folded.
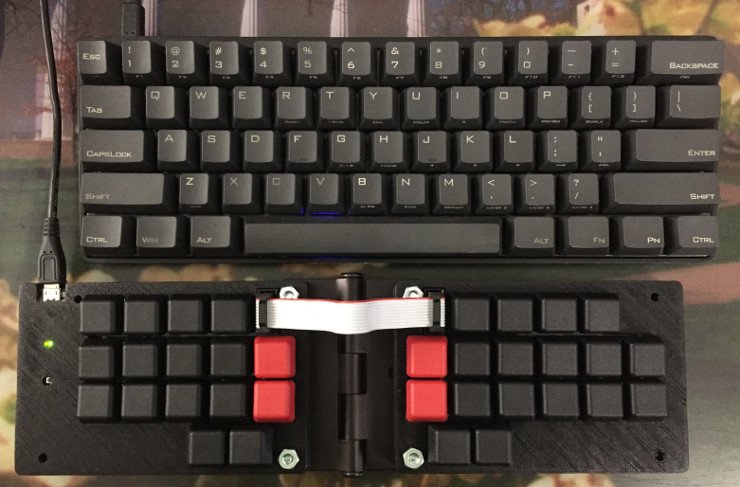
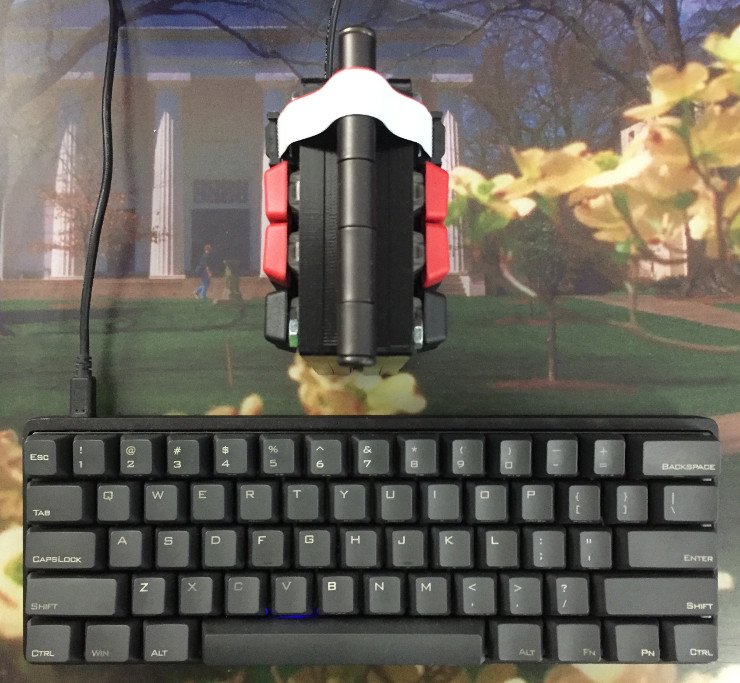
As you can see, the Stenomod has pretty much exactly the same size as my Pok3r when unfolded.
Another reason to get the Stenomod was its input protocol. While some steno keyboards such as the SOFT/HRUF output letters exactly the same way as a normal USB keyboard, the Stenomod uses the TX Bolt protocol. Because of this, you can tell Plover to only listen to this kind of input while leaving the input from a normal USB keyboard untouched. As a result, you can use a QWERTY keyboard while Plover is active. This is huge! Especially for a total beginner like me.
Let’s talk about the first hands-on experiences.
After plugging in the Stenomod and selecting TX Bolt in the Machine configuration in Plover, I received this:
PermissionError: [Errno 13] Permission denied: '/dev/ttyUSB0'
A simple fix that I found here was to add myself to the uucp group like this:
sudo gpasswd -a martin uucp
Note that this might be specific to my Arch Linux installation and that other distributions might have different group names such as dialout for Ubuntu.
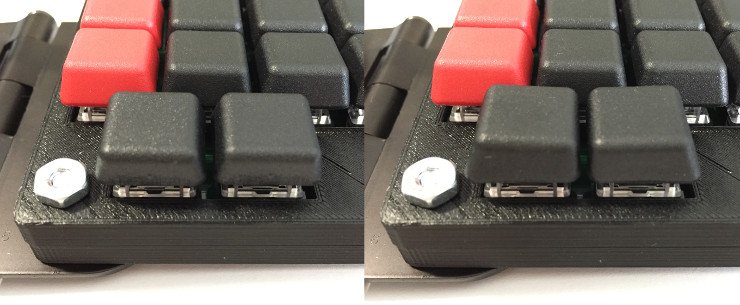
After this, everything worked like a charm. I really enjoy the low amount of force that is required to press a key, especially in comparison to the Cherry MX Clears on my Pok3r. This is quite important since you very often have to press two keys with one finger. A small modification that I did to the default key placement was the vowel keys. Since it is very common to press both vowel keys with the thumb, I wanted to minimize the gap between the keys. Luckily, rotating the keys resulted in a smaller gap. Here’s a before and after:
While the keycaps feel nice, I might want to replace them at some point for ergonomic reasons. One option are 3D printed keycaps such as these by Ted Morin. Another option would be acrylic keycaps such as the ones that Ted showed in a Steno Arcade video.
All in all, the first impression of my Stenomod is extremely positive. The TX Bolt input, the small footprint when folded, and the overall solid build quality are very good arguments for the Stenomod. The low activation force that is required also makes it a lot more comfortable to type on when compared to normal mechanical keyboards with Cherry MX switches.
My next post will be about my progress during the first few weeks.
And in case you were wondering: This is not a sponsored post. I paid the full price for the Stenomod and its creator Charley didn’t know that I’d write about it.